

Enter, Print & Tag
Get Your Items Ready for The Sales Floor!
How to Enter, Print & Tag
Tagging is the process of entering the items you want to sell into MyCM, printing out the tags, and securing them to your consignment items. It is important that your online inventory is accurate and your printed tags are well secured.
Step 1: Enter

Step 1: Entering Your Items
All consignors must enter items through the MyCM software system which is linked to your consignor account. Handwritten tags are NOT accepted.
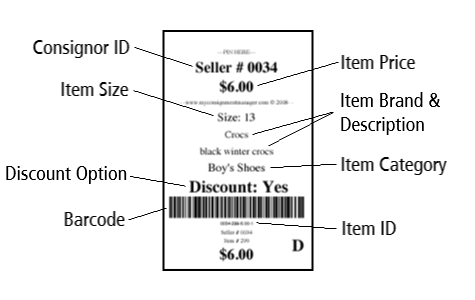
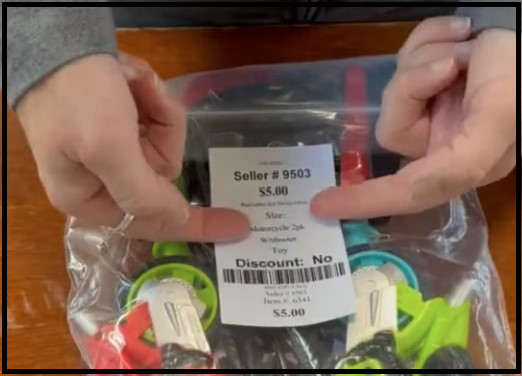
Tag Example
- Go to the WeeUsables website.
- Click on the Login drop down bar and select your sale location.
- Select “Returning Consignor” to log into your account (you are ‘returning’ if you are already registered)
- Log into your account.
- Now that you are logged in, click on “Manage Items”.
- To enter items, click on the “Add” drop down menu and select “Add (Manual)” (Voice entry is also available.).
- Begin entering the details of your items (see example tag above for reference).
- Choose the appropriate category for tax purposes.
- Enter the size shown on the manufacturer’s tag, not how you personally feel it fits. You may include additional sizing information in the description or may write it on the tag, if needed.
- Enter Brand
- Be VERY specific with the brand name as we use this field to match lost tags with items, should they become separated—Examples: Baby Gap, Skip Hop, Pottery Barn, Melissa & Doug, Step 2, Lilly Pulitzer, etc.
- Enter a Description
- Be VERY descriptive as we use this field to match lost tags with items, should they become separated. You may abbreviate brand, colors and description.
- Clothing example: Lt pnk ¼ zip w/ hood, or blk jean jmpr
- Toy example: LilPpl farm set
- Puzzle example: 12 pc wood peg
- Stroller example: Blk dbl jogger, etc.
- Be VERY descriptive as we use this field to match lost tags with items, should they become separated. You may abbreviate brand, colors and description.
- Select a Price
- The most successful consignors consider the brand, condition and desirability of the item when determining the price. Generally, we recommend starting about 30% of the original retail price and adjusting up or down as needed.
- Click here for the "Pricing" suggestion page.
- Discount Box
- The default discount is YES, so uncheck the box if you DO NOT want the item to scan at ½ the ticketed price during the discount sale.
- Donate Box
- The default for donate is YES, but we do not use this feature of the program. Please note: Any items that remain on the sales floor after Consignor Pick-up ends will be included in the charity Stuff-A-Bag event.
- “Add Item” Drop-down Feature
- This option saves time if you are selling multiple identical items. Each tagged item must have a different item number. This feature allows you to enter the total quantity of identical items (e.g. good for consignors with twins/triplets).
- Click “Add” to enter your item into the sale database.
Step 2: Print
Step 2: Printing Your Tags
Once you have all your items entered into your Wee account, it’s time to print! You can easily print your tags from a home printer; OR, consider uploading the tag PDF to a local print shop (Staples or Office Max, etc). Watch our helpful step-by-step video above. You are welcome to use our Office Max Store Discount Card linked here. The card only works for in-store purchases.
- Log into your Wee account.
- Click on “Manage Items”.
- Select the items you would like to print by checking the boxes on the left of the screen.
- Click the grey “Print” box above.
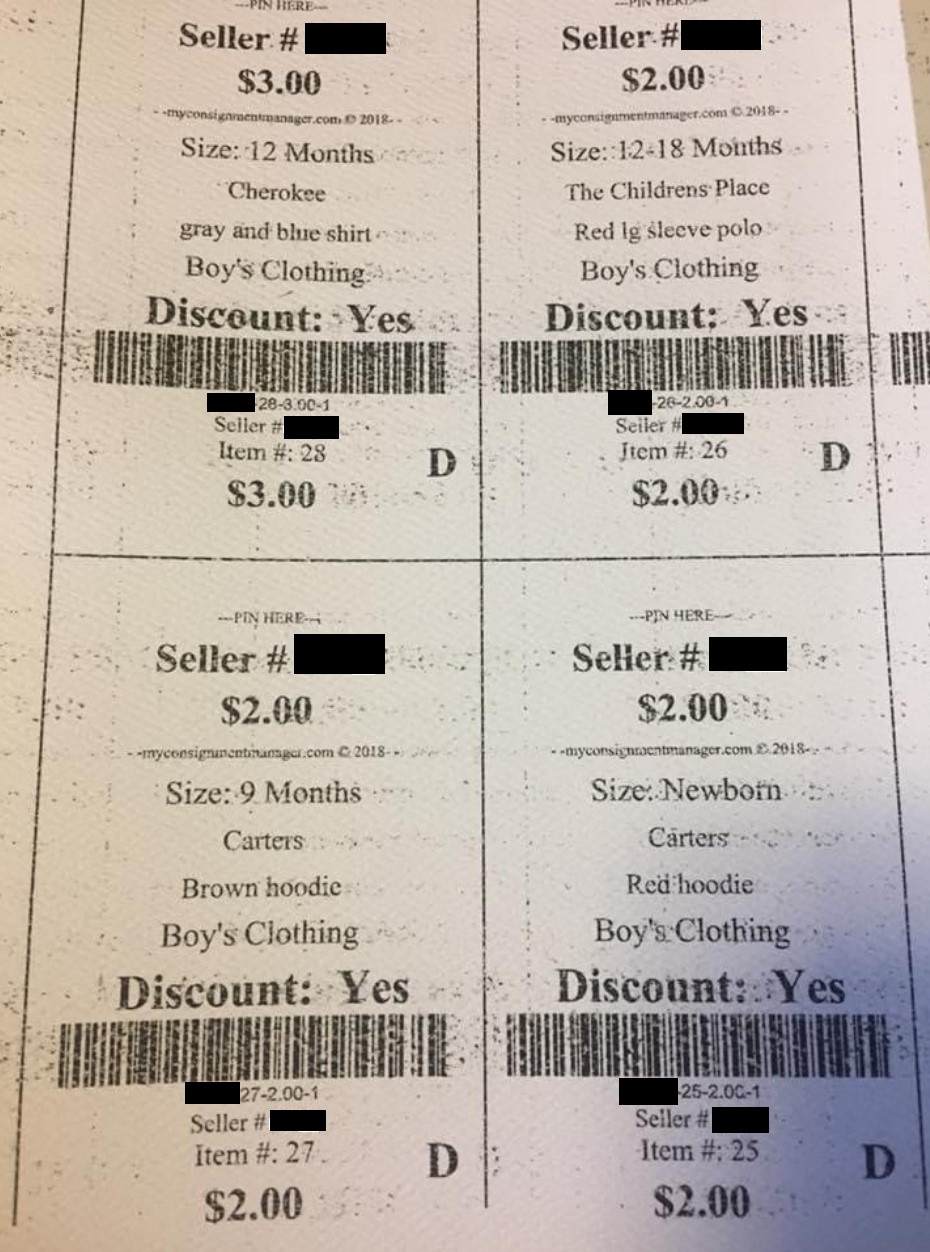
- The program will create a PDF of all the tags you clicked to generate. See example below.

- Save the PDF file and test print one (1) page. If your tags look good, continue printing the remaining tags. See "Tag Quality", below, for troubleshooting.
- If your tags are not clear, please make sure your printer quality is set to either “quick print”, “normal” or “fast”. DO NOT use “high quality”.
Printing Guidelines
- Consignors must use cardstock, heavy weight paper. Anything 60lbs or above is accepted. NO STICKER TAGS.
- Tags print best on white; however, light colored cardstock is acceptable. NO SPECKLED OR TEXTURED PAPER.
If you need to change a price or discount on an item, DO NOT modify the tag by hand. Instead, you must make the change in your Wee account and reprint the tag. Hand-modified prices or discounted tags will not be accepted at the sale.
Click here for more info or if you have questions.
Tagging Fees
We reserve the right to charge a fee for unscannable barcodes. Common issues resulting in a tagging fee are poor print quality, overly dense or faded barcodes, or improperly trimmed tags (i.e. the barcode is cut off). Click here for the latest Quality fees.
Tag Quality
The print quality of the barcode is critical for making sure your item is properly credited when sold. High-quality tags speed up the checkout process and help keep our line moving. Consignors with a number of unscannable tags will have a fee deducted from their consignor earnings. Click here for the latest Quality fees.
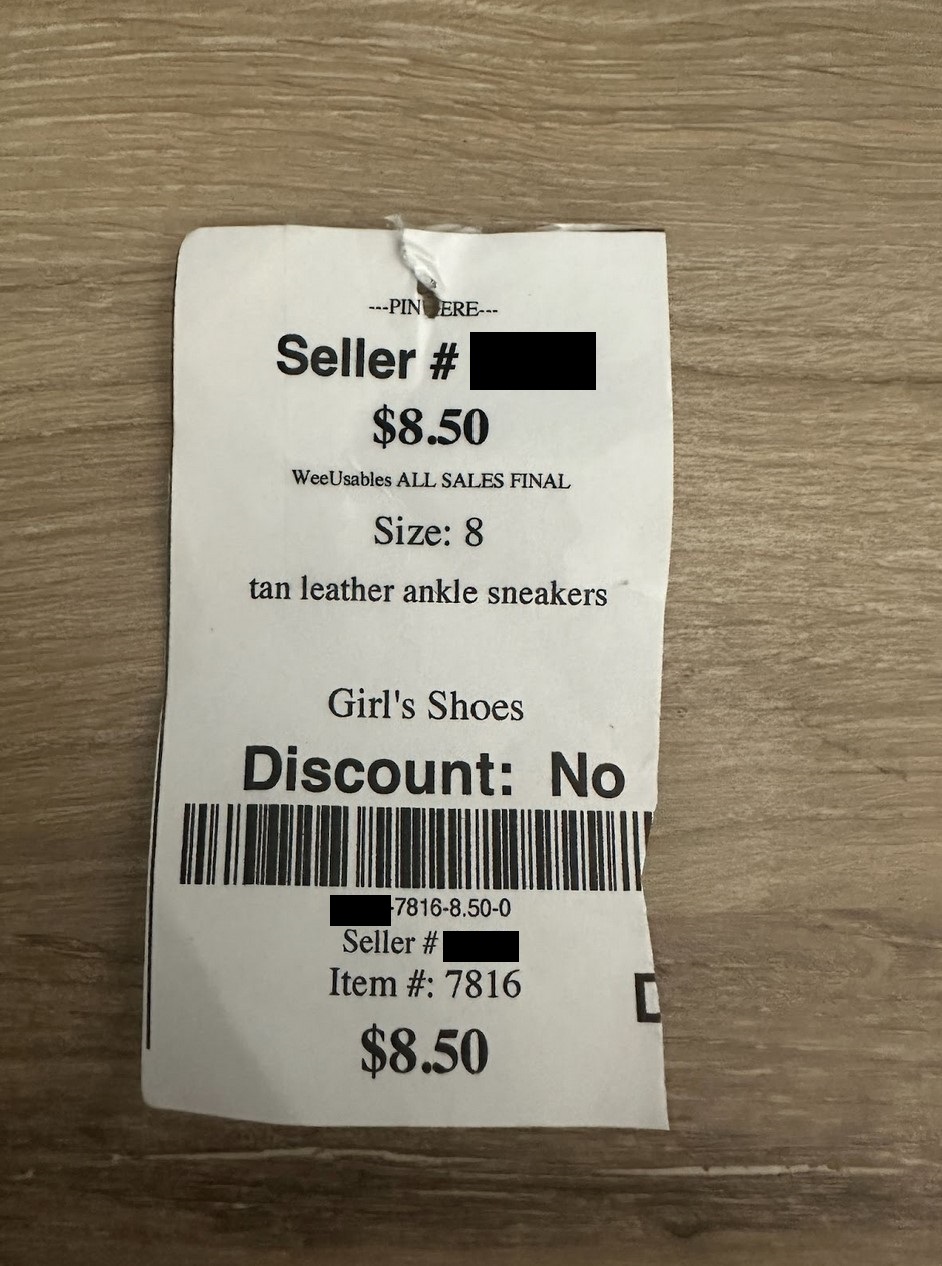
Examples of poor-quality tags—click the image to see an enlarged view.
Do not place tape over the bar code as our scanners cannot read it.
Barcode is illegible, unable to be scanned.

Barcode spacing is not crisp. Ink is too heavy.
Barcode cut off - right side
Step 3: Tag
Step 3: Tagging Your Items
Once you’ve printed your tags, it’s time to attach them to the items.
You’ll need a few supplies to properly tag and package your items for the sale, so grab these before you get started.
- Hangers—plastic or wire
-
- Consignors supply their own hangers. Check out the article in this link for ideas on where to find them free or really cheap!
- Consignors do not get their hangers back after your items are sold.
- You are welcome to collect any leftover hangers after the Stuff-A-Bag event at each location.
-
- Tagging guns & plastic barbs are the most secure method for tagging clothing—You may also use safety pins but NO STRAIGHT PINS
- Scissors or paper cutter
- Clear, zip-top-style bags of various sizes
- Clear packaging tape–We do not recommend household scotch tape
- Painter’s tape–Must be used on books and any delicate surfaces such as puzzles and games
- Zip ties are a great way to secure items together
Tagging Clothing Items
- ALL CLOTHING MUST BE HUNG ON A HANGER
- When looking at the item, the hanger hook must face left, like a question mark “?” (see example below)
- Pant hangers are best for jeans, leggings, khakis, skirts and shorts; OR you may attach the item to the hanger “shoulders” using safety pins or zip ties (see example below)
- Do not attach the item to the hanger’s bottom/horizontal bar as both safety pins will slide to one side making it difficult for shoppers to see the item
- Outfit hangers are best for hanging multiple items; OR you may hang outfits on multiple hangers and use rubber bands or zip ties to secure the hanger necks together. However, each hanger neck counts as one (1) item towards the 100 piece hanging childrens’ max and 10 piece hanging maternity max. (Please note: When selling items together, DO NOT pin a second item to the fabric of the first item as the pins will cause holes in the fabric.)
- Matching accessories should be placed in a clear Ziploc bag and attached to the hanger
- Button all buttons, zipper all zippers, snap all snaps, etc.
- TIP: If you plan to pick up any unsold items, you may mark your hangers with string, ribbon or tape to be able to find them easier within the clothing racks during Consignor Pick-up
Tagging Clothing with a Tagging Gun
PLEASE BE CAREFUL WHERE YOU TAG in order to avoid holes. Items with holes may be removed from the sales floor.
Attach the tag into a seam or the hanging manufacturer’s size tag (at the neck or waist) to avoid damaging the fabric with the tagging needle.
Watch Heidi's Helpful "Tagging Tips" Video!
Attach tag to manufacturer’s tag or inside seam. DO NOT attach tags through fabric as you risk creating holes.

Tagging Non-Apparel Items
- Accessories such as hats, gloves, socks, tights, NEW underwear, training & nursing bras, swaddles, hair accessories, kids’ jewelry, etc., can be bagged.
- Toys: Tags may be attached directly to non-delicate surfaces with packaging tape. Small toys may be bagged.
- Shoes: Attach shoes and tags with zip ties. Small shoes may be bagged. Brand new, never worn shoes may remain in their original boxes.
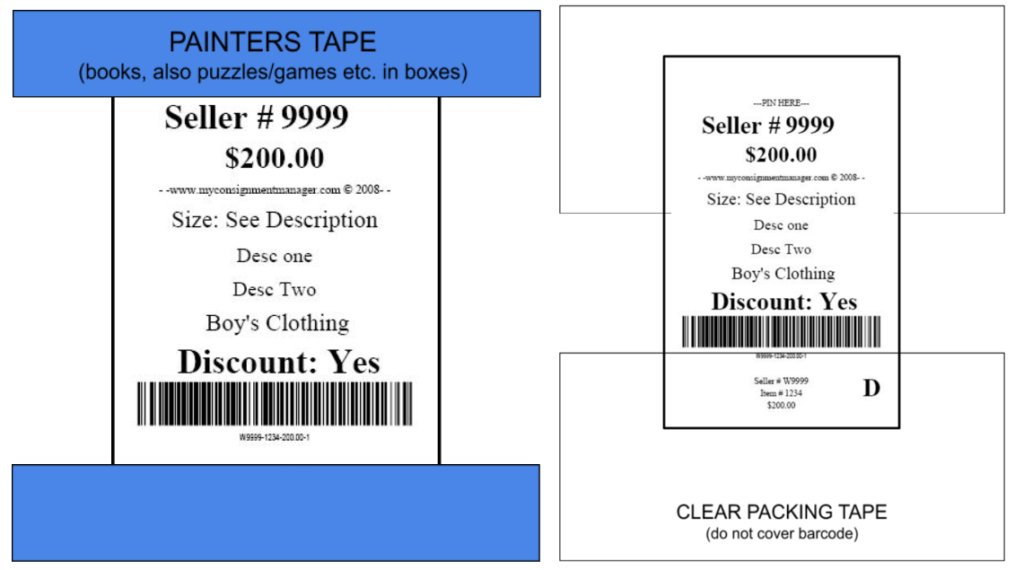
- Books: Must use painter’s tape when applying a tag directly to a book to avoid ripping the cover. When selling multiple books together, you may use a plastic bag or painter’s tape to prevent separation at the sale. If selling multiple books, consider attaching a list of what is included.
- Boxed Puzzles & Games: Boxed puzzles will be displayed on their side, therefore, please use painter’s tape to ensure the boxes remain closed. Also use painter’s tape to attach the tag to the box in order to avoid rips.
- Flat Puzzles & Games: Wrap flat puzzles or games tightly with plastic wrap. If you use a Ziploc bag, secure it tightly to show a complete puzzle. If you are selling two puzzles together, secure them back to back.
- Owner Manuals: Not required but preferred. Please place the manual in a plastic bag and attach the bag to the item.
- Do not cover the barcode when taping across the bottom and top of the tag. Covering the barcode may result in an unscannable tag.
- Tags must be on the outside of all bags.
- PA state law requires us to use a government-issued sanitizing spray on items that include fiber fill. This includes most baby equipment such as pack-n-plays, high chairs, jumperoos, bouncy seats and strollers, etc.
WeeUsables is not responsible for lost or stolen items.